In cabinet making, the quality of your joinery plays a pivotal role in the functionality of the finished product. Plywood is one of the most used materials in cabinetry and joinery. However, achieving flawless, durable joins requires skill, precision, and deep understanding of the right techniques.
Dado Joint
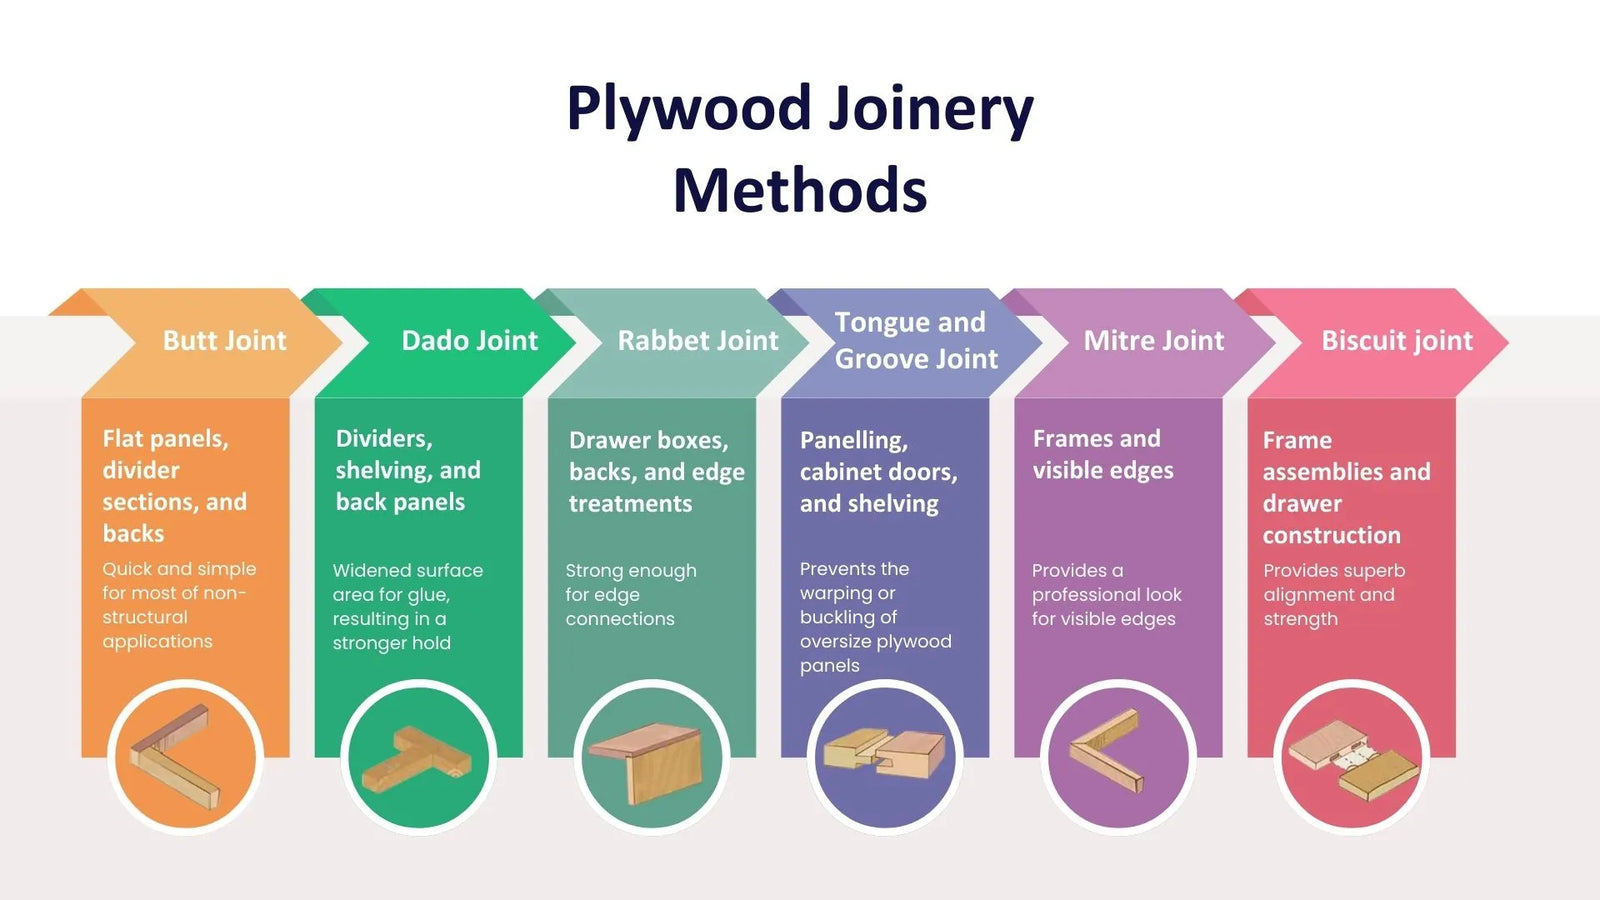
A dado joint involves cutting a groove across the grain of the plywood sheet, into which another piece easily fits. This technique is commonly used for dividers, shelving or the back panels of cabinets.
The dado joint offers more surface contact than a butt joint (next), which increases the bonding area. However, dado joints should only be used for non-stress-bearing straight connections, as they may weaken the integrity of the plywood board if badly executed.
The dado should be approximately 1/3 the thickness of the plywood, ensuring it doesn’t weaken the material. Glue application to both the dado and the edge of the fitted piece ensuring a strong bond.
Why use it in joinery?
- Widened surface area for glue, resulting in a stronger hold.
- Excellent solution for shelf support or making cavities for shelves in cabinetry.
Butt Joint
The butt joint is the easiest and one of the most commonly used joints in construction involving plywood. It connects two pieces of plywood directly edge-to-edge, without any additional interlocking or overlapping parts. The connection is usually done with application of quality wood glues that comply with Australian standards (such as AS/NZS 4364:2018 for wood adhesives).
While the butt joint is simple and quick to create, it is considered one of the weakest forms of plywood joinery because it only relies on the surface area of the edges for bonding. This makes it less suitable for high-load or structural joinery applications. That’s why butt joints are usually reinforced with screws or nails to meet the strength standards required in cabinet making.
Why use it in joinery?
- Cost-effective for budget-friendly projects.
- Quick and simple for most of non-structural applications.
- Useful for flat panels, divider sections, and backs where strength isn’t a primary concern.
Rabbet Joint
A rabbet joint is created by cutting a notch along the edge of a piece of plywood, allowing another piece to fit into the cut. This type of joinery is common for cabinet drawer boxes, backs, and edge treatments. The rabbet joint provides a stronger connection by creating a larger surface for bonding. It is more effective than a most popular butt joint, but it still requires reinforcement with nails and screws for heavy-duty work in high-stress areas. The rabbet should be cut at the correct depth (typically around 1/2 the plywood thickness).
Why use it in joinery?
- Strong enough for edge connections.
- Helps in creating clean edges, mostly used in drawer construction.
- Useful for internal structural joints where visual concerns are secondary.
- Easy to disassemble.
Tongue and Groove Joint
A tongue and groove joint promotes cutting a projecting tongue on one edge of the plywood, which fits into a matching groove on the adjacent piece. This technique is commonly used in panelling, cabinet doors, and shelving.
This joint is renowned for its ability to prevent contraction and expansion, making it useful for flat panels that need to stay aligned. However, in this method precision is crucial, as faults in cutting often result in gaps and or misalignment, weakening the joint. For heavy-duty applications, a tongue and groove joint should also be reinforced with dowels or screws.
Why use it in joinery?
- Perfect for securing large panels, especially for doors or backs.
- Prevents the warping or buckling of oversize plywood panels, which is important in extra-humid environments like kitchens.
Mitre Joint
A mitre joint implicates cutting the edges of two pieces of plywood at a 45-degree angle and joining them to form a corner for frames, or any application requiring an angled, sharp appearance.
Mitre joints are popular for their simplicity, but they can be prone to weak spots, particularly in plywood, due to the narrower surface area for glue. Therefore, mitre joints should be reinforced with additional mechanical fasteners or reinforcement dowels.
Why use it in joinery?
- Provides a professional look for visible edges.
- Conceals the raw edges of plywood, which is necessary when using veneer or laminated plywood for visible surfaces.
Doweling Joint (Biscuit joint)
A doweling joint (or biscuit joint) uses cylindrical wooden dowels inserted into pre-pressed holes in two pieces of plywood to build a vigorous and precise connection. This joint is widely used in frame assemblies and drawer construction.
Doweling provides superior alignment and toughness, especially for complex and large pieces of cabinetry. However, accuracy is paramount— proper doweling jigs are crucial to achieving a high-quality result. The misaligned dowels will result in weak or unsightly joints.
Why use it in joinery?
- Provides superb alignment and strength.
- Top-notch for creating precise and sturdy connections in drawer boxes, doors, and cabinet frames.

